Save your eyes while saving paper.
I try to print as little as possible, so I often use a double-page print layout. That way, each printed page includes two logical pages. This is called a 2-up format (you can have 3-up, 4-up, N-up).
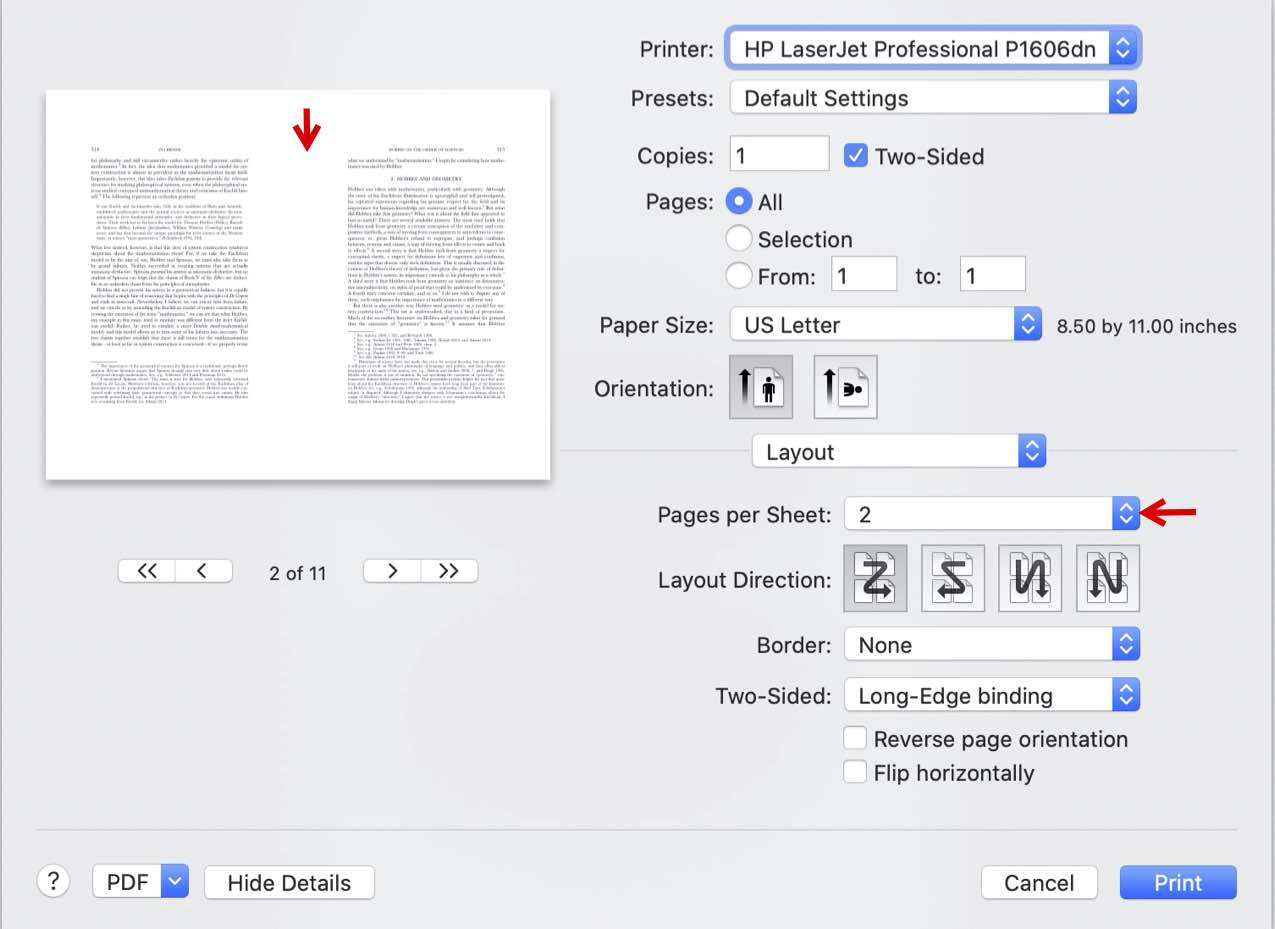
The problem is that Apple’s N-up feature is pretty bad. You get it by selecting Layout in the print dialog, and then selecting 2 Pages per Sheet. This combines pages in a very inefficient way. For example, most journals use page sizes that are far smaller than 8x11, so when you 2-up them, the resulting page has lots of white space. You can see this in the print preview for a paper from the Southern Journal of Philosophy. This page is hard to read, because the text is so small.
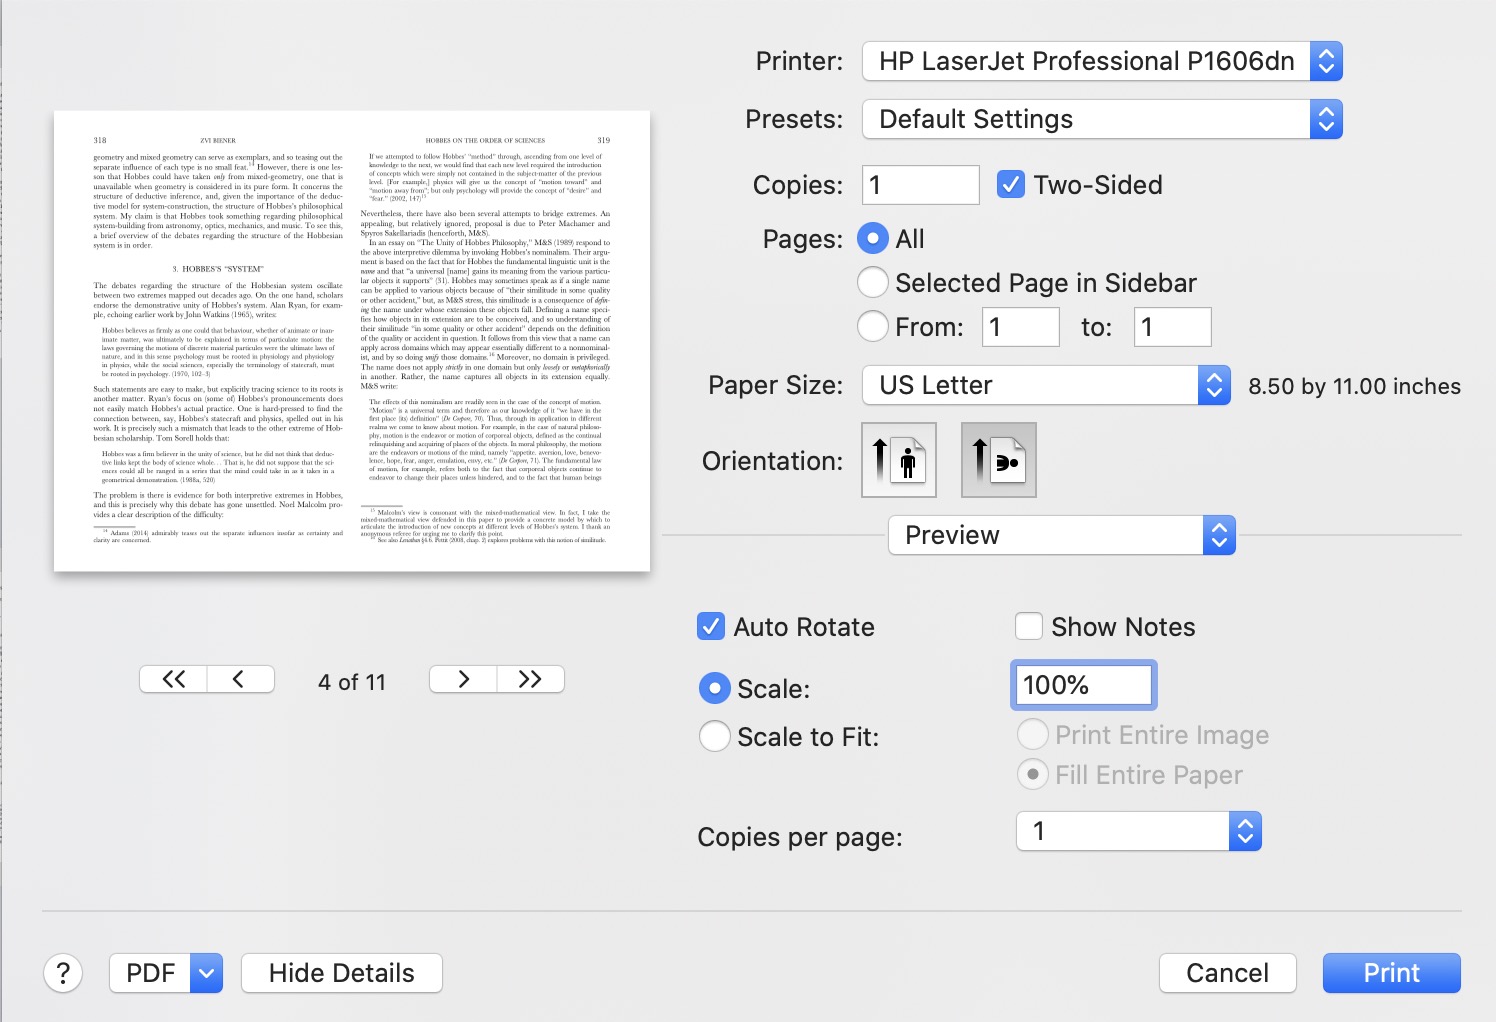
A more efficient procedure is to crop out the white space, and then combine the pages with minimal margins. Notice the bigger text:
You can use follow the instructions below to create an efficient 2-up “Printer Plugin” for MacOS. Use it by opening the print dialog, and selecting Crop and 2-Up (or whatever you name it) from the lower-left drop-down menu. After a few seconds (large documents will take longer), Preview will open with the properly combined document. Now print it, save it, file it, etc.

Caveat: This will only work with PDFs. For other formats, first print the document to PDF, and then print the PDF using this plugin. Make this process quicker with a few one-time steps: select the “Edit Menu” in the print services menu (the lower-left drop-down), hit the plus sign, and select an often used folder (I use Downloads). From that point on, when you select that print option in the drop-down menu, a PDF will be generated in that folder without going through the “Save As” dialog.
Instructions
- Get a LaTeX installation from http://www.tug.org/mactex/. I recommend the “Smaller Download.” Install it. (Skip if you already have one.)
- Open the Terminal app. Type in:
sudo tlmgr install pdfcrop pdfjam
You’ll be asked for your password.
- Download this file. Unzip. Double click. You’re done.
Under the Hood
If you want to create the workflow from scratch, do this:
- Open the Automator app. Hit ⌘N to create a new workflow and select Print Plugin from next menu.
- Once a blank workflow opens, search the list of actions (on the left-hand side) for Run Shell Script. Drag it over to the right-hand side of the screen.
- Inside the Run Shell Script action, paste the following:
source /etc/profile
InputPDF=${TMPDIR%/}/tmp.pdf
CroppedPDF=${TMPDIR%/}/tmp-crop.pdf
NupPDF=${TMPDIR%/}/tmp-output.pdf

[[ -f $InputPDF ]] && rm $InputPDF
[[ -f $CroppedPDF ]] && rm $CroppedPDF
[[ -f $NupPDF ]] && rm $NupPDF

cp "$1" "$InputPDF"
pdfcrop --margins '10' --clip --verbose $InputPDF $CroppedPDF
pdfjam --nup 2x1 --delta "2mm 0mm" --landscape --outfile $NupPDF $CroppedPDF
open -a Preview $NupPDF
- Save the workflow with a name of your choosing. It will appear in your print dialog drop-down menu.