Using Home Assistant to Automate Vacuuming
12/05/2019 home assistant
Home Assistant is an open source home automation platform that puts local control and privacy first. It can be controlled through a browser, or though android and iOS apps. It can run on a variety of PCs - I have mine running on a Raspberry Pi. I’ve posted my configuration files - just keep reading.
I use Home Assistant to:
- Control 2 Xiaomi Robot Vacuums.
- Interact with a 1st gen Simplisafe alarm system to keep track of open doors, windows, and motion.
- Open/Close my garage door remotely.
- Keep track of a few Tile trackers.
- Keep track of phone locations, so it can execute various tasks when everyone leaves the house.
- Use motion control as a DYI alarm system.
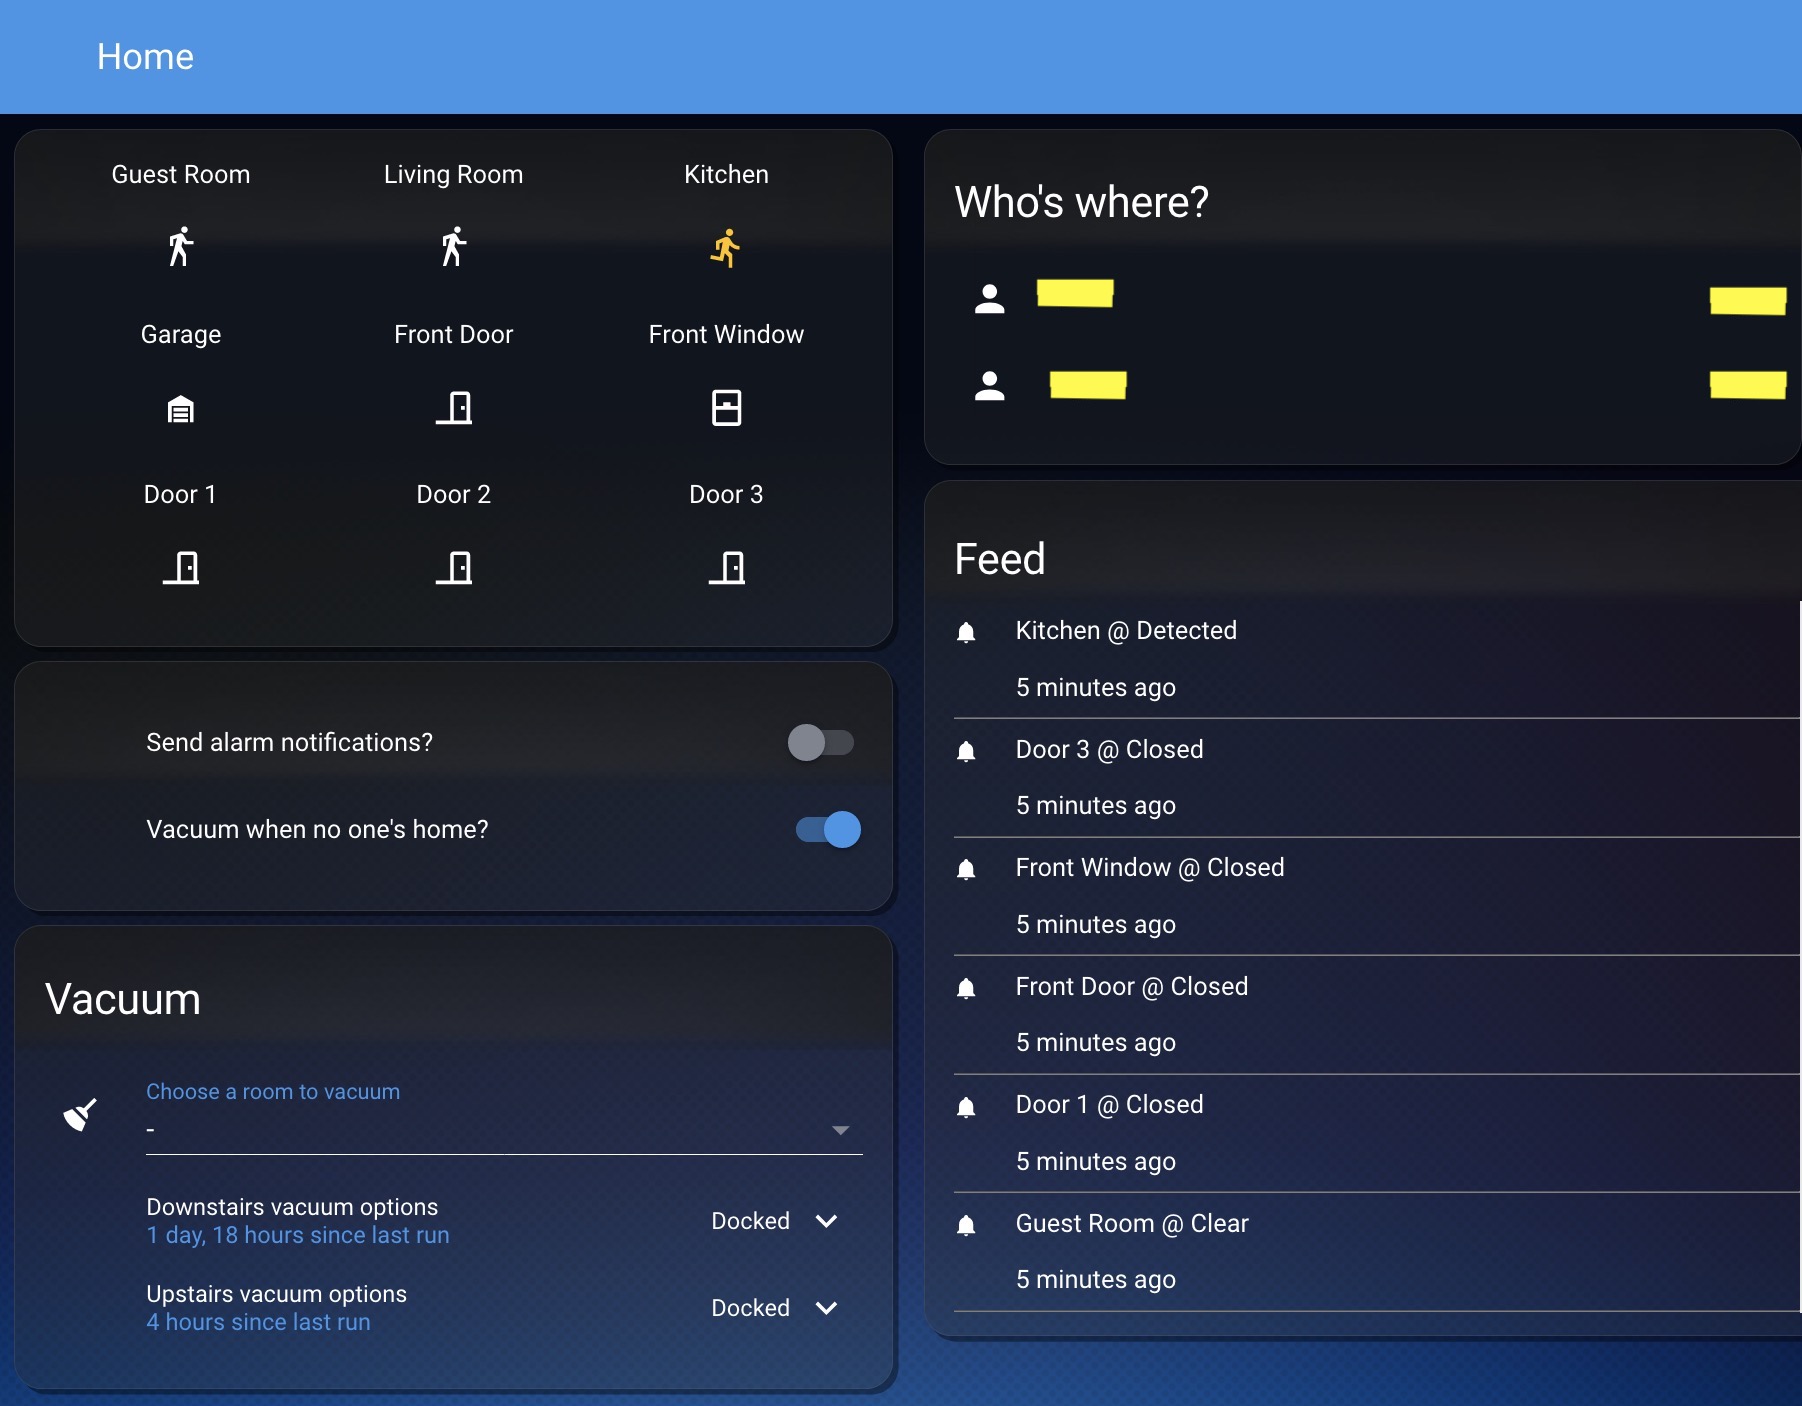
The GUI for the entire set-up looks like this (without any tiles):
 { width=80% }
I may compose detailed installation guides in the future, but there are many already available. The installation is not for the faint-at-heart, but it is getting easier everyday. The overall list of tasks for a proper install is long. You need to:
- Construct a Raspberry Pi
- Flash a drive with Hass.io
- (Optional) prepare a isolated segment of your network for automation devices. (I have two linked routers, one that manages devices with personal information, and the other manages automation devices).
- (Optional) Define proper routing in your network to reach the Raspberry Pi from the internet. Without this, you can’t control devices remotely, and what’s the fun in that?
- Make sure access to the RPi is secure using an SSH key.
- Install appropriate modules on Hass.io. I have Duck-DNS and SSH server modules for the remote access to work, and Samba module for local file access, an MQTT broker for communication between devices, and an RTL_433 to MQTT bridge to translate radio signals to digital ones (since my old alarm uses radio signals).
This is the basic setup. Now you need to define entities and actions for Home Assistant to manage, as well as a GUI of your choosing. So… instead of full-blown tutorials, I wanted to post my configuration files.
I’ll focus on the vacuums for now. Most of the underlying configuration is found here. Like all Home Assistant config files, it is a YAML file that defines sensors, input variables, scripts, and automations. Basically, it creates a list of rooms given a coordinate system, and a list of conditions under which the vacuums run. In total, the system:
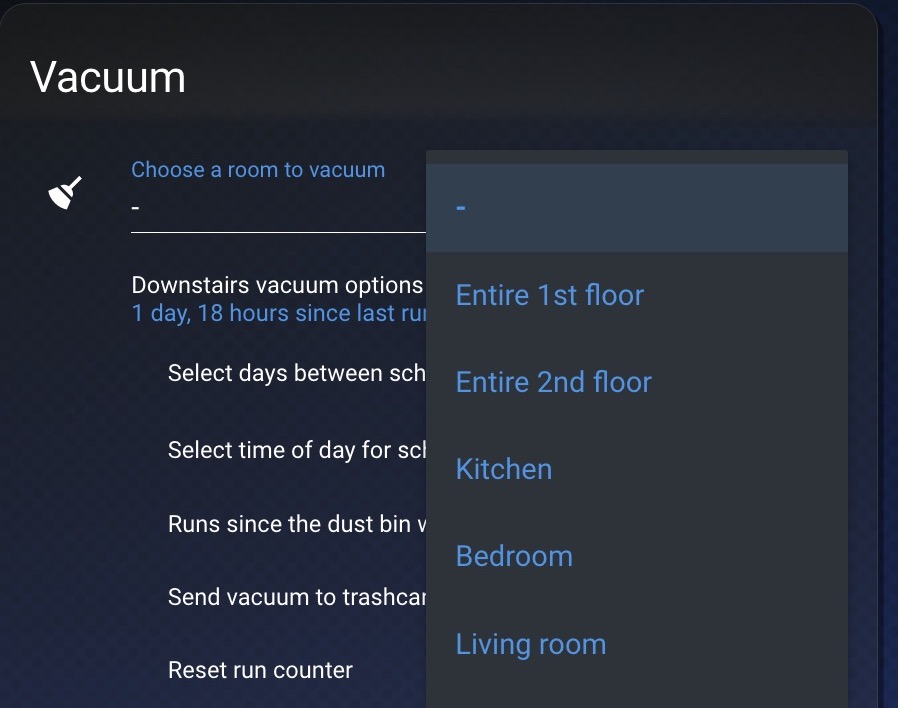
- lets me send a vacuum to any given room using the GUI
- will run the vacuums when the house is empty, but only once in a 36 hours period.
- will run the vacuums at specified times if the house hasn’t been empty for 36 hours.
- Send the vacuums to wait by after every 3 runs (for emptying).
The config is easy to follow, if you’ve dug into Home Assistant a bit. At the very least, it can give you ideas for how to construct similar scripts. Since Home Assistant recently allows for natural language processing, you can probably replicate these without mucking with YAML.
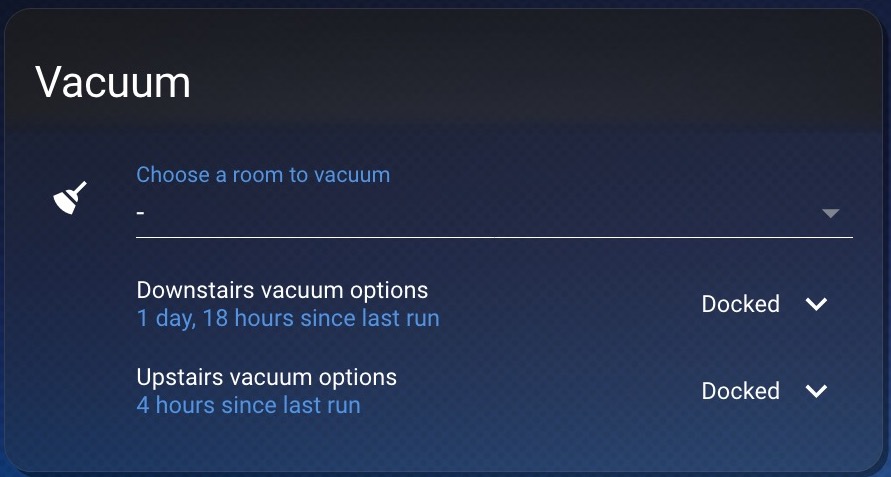
From the UI, the functionality looks like this:
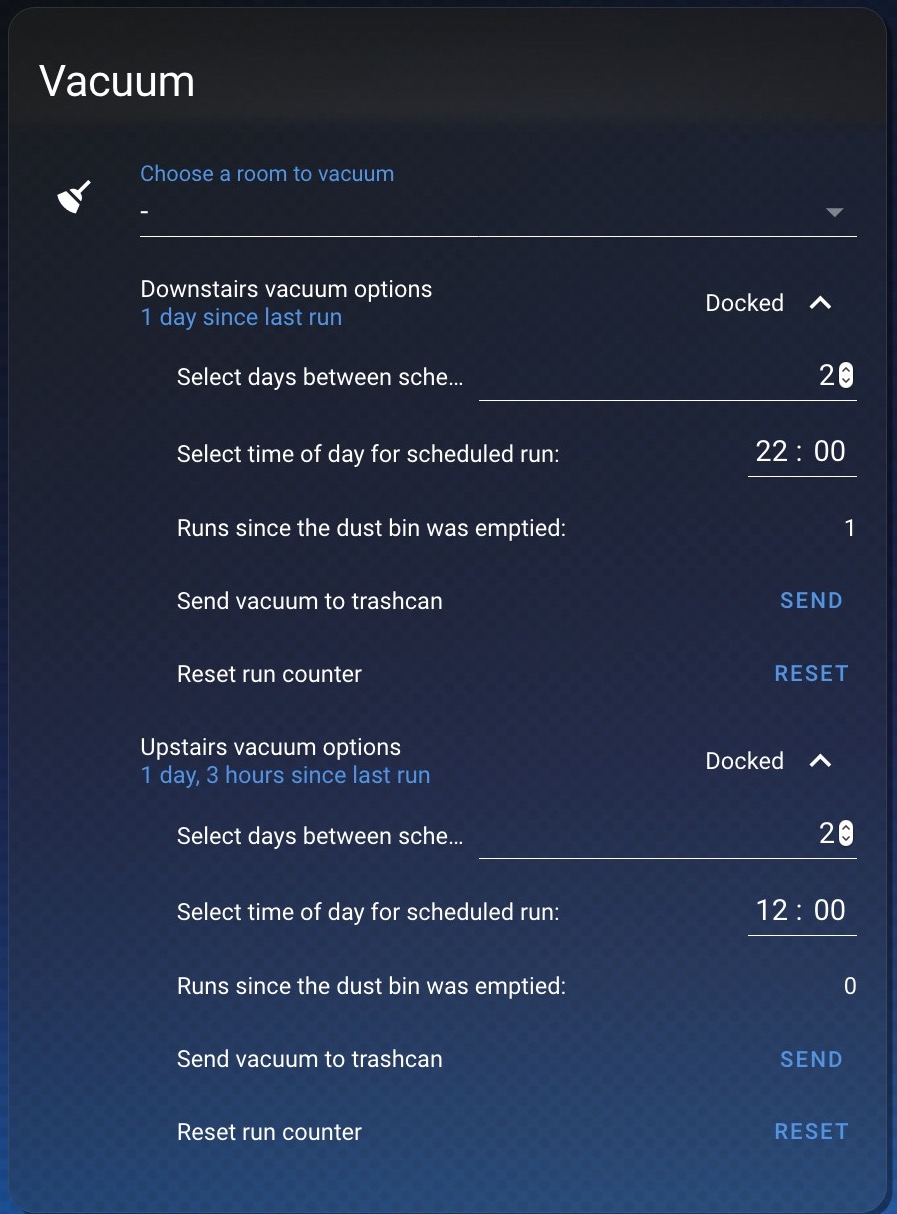
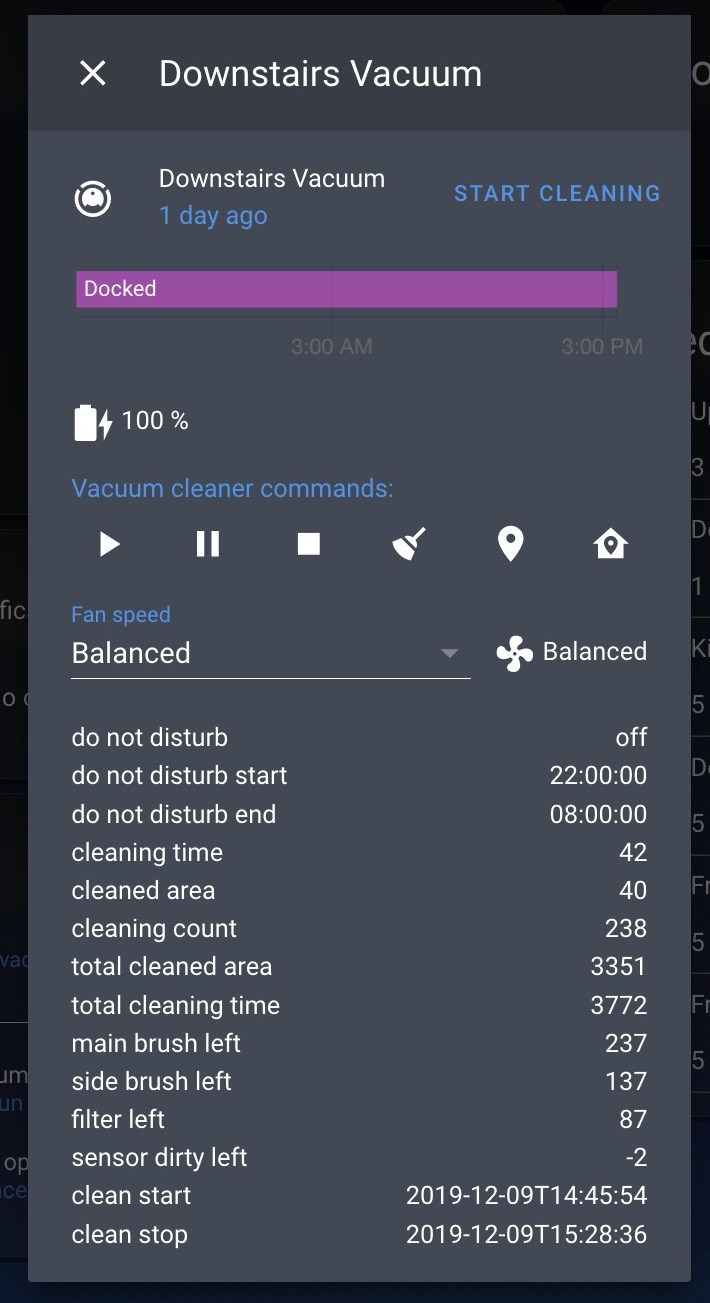
Full details on vacuum properties are provided directly by Home Assistant and look like this: